Halloween Tattoo Ideas
50+ Unique Halloween Tattoo Ideas by Global Tattoo Artists
-

Orange Blackwork Halloween Moon Skull Pumpkin Bats Tattoo on Men Hands by @arttwork7
Orange Blackwork Halloween Moon Skull Pumpkin Bats Tattoo on Men Hands by @arttwork7
-

Small Blackwork Ghost Halloween Tattoo on Women Wrist by @baileyavatattoos
Small Blackwork Ghost Halloween Tattoo on Women Wrist by @baileyavatattoos
-

Small Fine Line Ghost Reading Book Halloween Tattoo on Women Forearm by @aura_bodyart
Small Fine Line Ghost Reading Book Halloween Tattoo on Women Forearm by @aura_bodyart
-

Medium Traditional Jack o lantern Cherries Two Halloween Tattoo on Men Arm by @tattoos.by.heff
Medium Traditional Jack o lantern Cherries Two Halloween Tattoo on Men Arm by @tattoos.by.heff
-

Medium Blackwork Coffin Ghost Bats Halloween Tattoo on Women Thigh by @megferrytattoos
Medium Blackwork Coffin Ghost Bats Halloween Tattoo on Women Thigh by @megferrytattoos
-

Medium Blackwork Haunted House Bats Tombstones Halloween Tattoo on Men Leg by @alexramiltattoo
Medium Blackwork Haunted House Bats Tombstones Halloween Tattoo on Men Leg by @alexramiltattoo
-

Medium Neo Traditional Pumpkin Halloween Tattoo on Women Leg by @oddtattoos
Medium Neo Traditional Pumpkin Halloween Tattoo on Women Leg by @oddtattoos
-

Small Illustrative Ghost with Hearts Halloween Tattoo on Women Arm by @xanthianmoon
Small Illustrative Ghost with Hearts Halloween Tattoo on Women Arm by @xanthianmoon
-

Tiny Fine Line Ghost Halloween Tattoo on Men Arm by @artbeautyandsoul
Tiny Fine Line Ghost Halloween Tattoo on Men Arm by @artbeautyandsoul
-

Small Blackwork Pumpkin Halloween Tattoo on Women Arm by @tarastattoos
Small Blackwork Pumpkin Halloween Tattoo on Women Arm by @tarastattoos
-

Small Traditional Jack o lantern Ghost and Hamster Halloween Tattoo on Men Leg by @reelflytattoo
Small Traditional Jack o lantern Ghost and Hamster Halloween Tattoo on Men Leg by @reelflytattoo
-

Medium Neotraditional Black Cat Witch Halloween Tattoo on Women Leg by @naaat.j
Medium Neotraditional Black Cat Witch Halloween Tattoo on Women Leg by @naaat.j
-

Small Blackwork GothicWindowWithTreeAndMoon Halloween Tattoo on Women Arm by @marlotattoos
Small Blackwork GothicWindowWithTreeAndMoon Halloween Tattoo on Women Arm by @marlotattoos
-

Medium Blackwork Spiderweb Pumpkins Halloween Tattoo on Women Arm by @shelby.inks
Medium Blackwork Spiderweb Pumpkins Halloween Tattoo on Women Arm by @shelby.inks
-

Medium New School Frankenstein Bride in Coffin Halloween Tattoo on Women Leg by @randee_green_author
Medium New School Frankenstein Bride in Coffin Halloween Tattoo on Women Leg by @randee_green_author
-

Medium Neo Traditional Halloween Pumpkin Bats Flowers Tattoo on Women Foot by @my_style_mom
Medium Neo Traditional Halloween Pumpkin Bats Flowers Tattoo on Women Foot by @my_style_mom
-

Small Black and Grey Jack o lantern with Witch Hat and Leaves Halloween Tattoo on Women Arm by @leah_wilt_tattoo
Small Black and Grey Jack o lantern with Witch Hat and Leaves Halloween Tattoo on Women Arm by @leah_wilt_tattoo
-

Medium Watercolor Cat and Pumpkin Halloween Tattoo on Women Arm by @riotinkohio
Medium Watercolor Cat and Pumpkin Halloween Tattoo on Women Arm by @riotinkohio
-

Big Nightmare Before Christmas Sally Jack Oogie Boogie Halloween Tattoo on Women Thigh by @gina.nvink
Big Nightmare Before Christmas Sally Jack Oogie Boogie Halloween Tattoo on Women Thigh by @gina.nvink
-

Medium Blackwork Jack o lantern and Flowers Halloween Tattoo on Women Thigh by @adelemagpies
Medium Blackwork Jack o lantern and Flowers Halloween Tattoo on Women Thigh by @adelemagpies
-

Small American Traditional Jack o lantern Halloween Tattoo on Women Arm by @tattoosbyanisa
Small American Traditional Jack o lantern Halloween Tattoo on Women Arm by @tattoosbyanisa
-

Medium Neo Traditional Witch Cauldron with Bats and Fire Halloween Tattoo on Women Leg by @kirabishoppp
Medium Neo Traditional Witch Cauldron with Bats and Fire Halloween Tattoo on Women Leg by @kirabishoppp
-

Medium Traditional Halloween Pumpkins Banner Tattoo on Women Thigh by @budwizzo
Medium Traditional Halloween Pumpkins Banner Tattoo on Women Thigh by @budwizzo
-

Medium American Traditional Pumpkin Dagger Bats Halloween Tattoo on Women Arm by @bailey.parke
Medium American Traditional Pumpkin Dagger Bats Halloween Tattoo on Women Arm by @bailey.parke
-

Medium American Traditional Black Cat on Pumpkin Halloween Tattoo on Women Arm by @melissamartellart
Medium American Traditional Black Cat on Pumpkin Halloween Tattoo on Women Arm by @melissamartellart
-

Medium Traditional Pumpkin Halloween Tattoo on Women Arm by @kenxie.art
Medium Traditional Pumpkin Halloween Tattoo on Women Arm by @kenxie.art
-

Medium New School Halloween Ghosts Pumpkin Web Tattoo on Women Arm by @nyxenink
Medium New School Halloween Ghosts Pumpkin Web Tattoo on Women Arm by @nyxenink
-

Small Black and Grey Pumpkin Halloween Tattoo on Women Arm by @chainsawdarling
Small Black and Grey Pumpkin Halloween Tattoo on Women Arm by @chainsawdarling
-

Medium Neo Traditional Witch with Eye Flower Halloween Tattoo on Women Arm by @kirabishoppp
Medium Neo Traditional Witch with Eye Flower Halloween Tattoo on Women Arm by @kirabishoppp
-

Small Blackwork Ghost with Tombstone Halloween Tattoo on Women Leg by @theelectricant
Small Blackwork Ghost with Tombstone Halloween Tattoo on Women Leg by @theelectricant
-

Small Neo Traditional Pumpkin Buckets Halloween Tattoo on Women Thigh by @annie_tattoos
Small Neo Traditional Pumpkin Buckets Halloween Tattoo on Women Thigh by @annie_tattoos
-

Small Black and Grey Witch Hat Halloween Tattoo on Women Ankle by @toby_everyday_tattoo
Small Black and Grey Witch Hat Halloween Tattoo on Women Ankle by @toby_everyday_tattoo
-

Medium Blackwork Halloween Frame Tattoo on Women Thigh by @krissydiane_tattoos
Medium Blackwork Halloween Frame Tattoo on Women Thigh by @krissydiane_tattoos
-

Medium New School Halloween Globe Tattoo on Men Forearm by @shannontattooer
Medium New School Halloween Globe Tattoo on Men Forearm by @shannontattooer
-

Medium Neo Traditional Purple Bunny with Coffin and Scythe Halloween Tattoo on Women Arm by @itscrizti.tattoo
Medium Neo Traditional Purple Bunny with Coffin and Scythe Halloween Tattoo on Women Arm by @itscrizti.tattoo
-

Medium Neo Traditional Jack o Lantern Gumball Machine with Pig Balloon Halloween Tattoo on Men Leg by @ink_hopper
Medium Neo Traditional Jack o Lantern Gumball Machine with Pig Balloon Halloween Tattoo on Men Leg by @ink_hopper


Temporary Tattoos
-
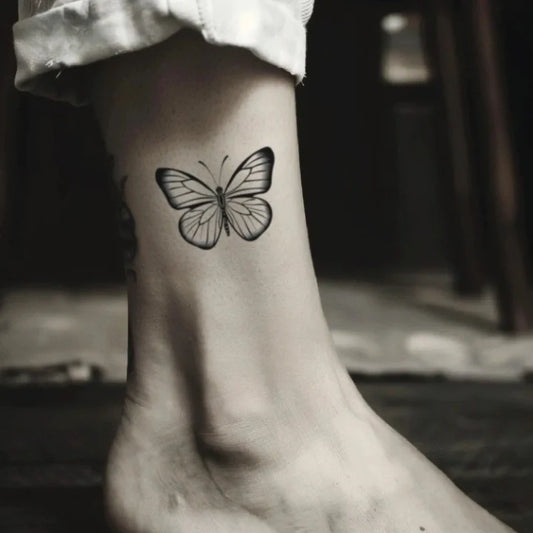
Simple Butterfly Temporary Tattoo
Vendor:TattoobnbRegular price $9.99 USDRegular price$9.99 USDSale price $9.99 USD -
Medusa Flower Temporary Tattoo
Vendor:TattoobnbRegular price $9.99 USDRegular price$9.99 USDSale price $9.99 USD -
Music Semicolon Temporary Tattoo
Vendor:TattoobnbRegular price $9.99 USDRegular price$9.99 USDSale price $9.99 USD -
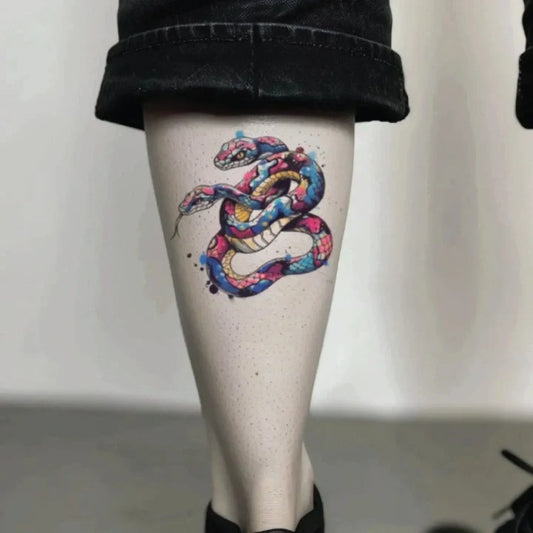
Colorful Two Headed Snake Temporary Tattoo
Vendor:TattoobnbRegular price $9.99 USDRegular price$9.99 USDSale price $9.99 USD -
Let Them Temporary Tattoo
Vendor:TattoobnbRegular price $9.99 USDRegular price$9.99 USDSale price $9.99 USD -
Tribal Phoenix Temporary Tattoo
Vendor:TattoobnbRegular price $9.99 USDRegular price$9.99 USDSale price $9.99 USD -
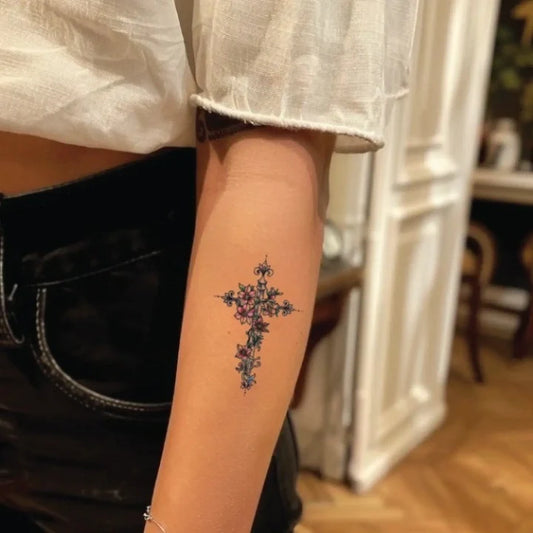
Flower Cross Temporary Tattoo
Vendor:TattoobnbRegular price $9.99 USDRegular price$9.99 USDSale price $9.99 USD -
Simple Skull Outline Temporary Tattoo
Vendor:TattoobnbRegular price $9.99 USDRegular price$9.99 USDSale price $9.99 USD